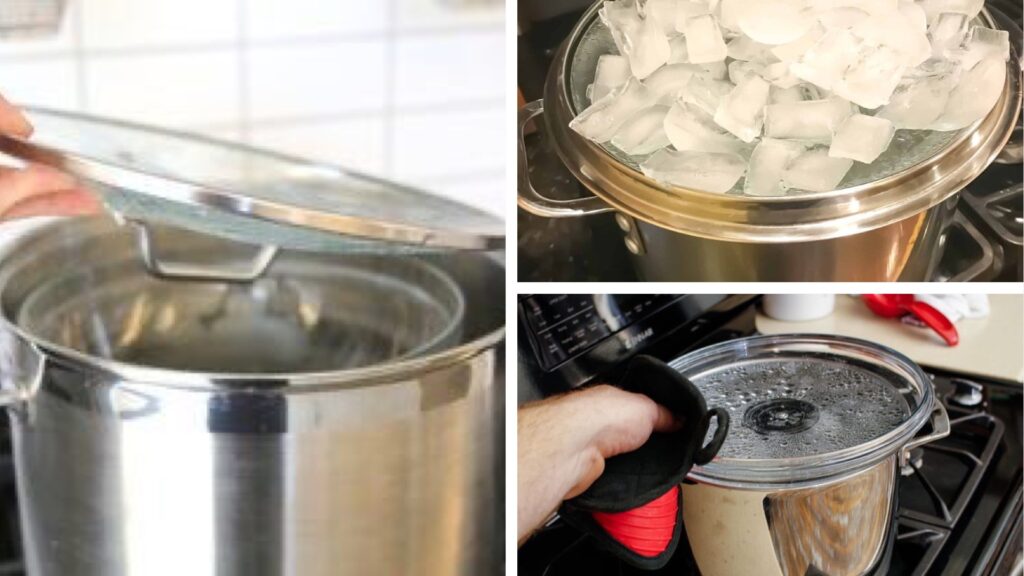
Want to build your water distiller at home? In just 10 simple steps, you’ll be distilling clean, pure water without any fancy equipment. From basic tools like pots and heat-resistant glass bowls to clever hacks that simplify the process, this guide covers everything.
Source: Pinterest
Whether you’re preparing for emergencies or just want fresh distilled water, these steps will have you sipping in no time.
1. Items You Need to Build a Water Distiller
Before diving in, let’s compile a list of all the requirements for building your water distiller. To make this, you’ll need a large pot, a heat-resistant glass bowl, ice, a lid, and water.
Source: Pinterest
Having everything on hand makes the process smoother and more enjoyable. This DIY project is more fun if you can do it with friends or family.
2. Set Up Your Pot on the Stove
Now that you have your materials, place the large pot on the stove. Add some water into the pot but not a lot of it; halfway down the pot should suffice.
Source: Pinterest
Just a reminder, the pot is the main component of your water distiller, so it should be clean and prepared for use. This is where the magic of distillation will happen.
3. Place a Heat-resistant Glass Bowl Inside the Pot
Next, place the heat-resistant glass bowl inside the pot. It should balance on the water without touching the bottom of the pot.
Source: Pinterest
This bowl will collect the distilled water, so positioning it correctly is crucial. Ensure that there’s enough space for the steam to condense and drip into the bowl. You are closer to getting your water distiller.
4. Cover Up the Pot
It’s necessary to cover the pot with a lid. If the lid doesn’t fit tightly, then you can use a clean kitchen towel to create a seal.
Source: Pinterest
This step is very important as it helps trap the steam inside, allowing it to condense and drip into the bowl. This tip is great if you want to get the most out of your water distiller.
5. Place Ice On top of the Lid
Here comes the cool part—literally. Place ice on top of the lid. The cold temperature will help the steam condense more quickly, making your water distiller even more effective.
Source: Pinterest
You can replace the ice as it melts to continue with the condensation process. This little trick is a real game-changer for homemade distillation.
6. Turn on the Heat
Now it’s time to turn on the stove and boil the water. Keep an eye on it, as you don’t want it to spill over.
Source: Pinterest
The steam will go up, hit the cool lid, and start forming droplets that will drop into the bowl. Watching this process unfold is pretty satisfying and rewarding.
7. Collect the Distilled Water
It’s advisable to monitor your water distiller after about 30-60 minutes. Thereafter, you should see distilled water collected in the bowl. It will be hot so you need to use oven mitts to take out the bowl gently.
Source: Pinterest
This is the final step in which all the efforts you’ve put in are rewarded, and you get to enjoy pure, clean water. A true DIY life hack for anyone.
8. Store Your Water Safely
When you have your distilled water, you need to store it properly. So, use clean, airtight containers to keep it fresh and prevent contamination. It’s necessary to label your containers so that you know what’s inside.
Source: Pinterest
With distilled water ready at home, you have endless possibilities—from drinking to cooking. It’s a great way to have pure water whenever you need it.
9. Clean Your DIY Distiller
When you’re through with your water distiller, ensure that you wash all the components thoroughly. This step is very important so that it remains efficient and your distilled water remains free from contaminants.
Source: Pinterest
Wash the pot and bowl with soap and water. A clean setup results in a better taste of the water you’re drinking.
10. Experiment and Enjoy
Now that you’ve successfully built your water distiller, feel free to experiment. You can try distilling different types of water or even infusing flavors. The possibilities are endless.
Source: Pinterest
Enjoy the process, and share your newfound knowledge with friends and family. You’ll be the go-to person for homemade distillation.
Get Distilling Today
That’s it, you’ve just learned 10 easy steps on how to make your water distiller at home. Enjoy clean, fresh water anytime, save money, and reduce harmful chemicals like PFAS in your drinking water.
Source: Pinterest
So why wait? Get all your materials and start distilling today. Don’t forget to share this post and your experiences with your loved ones.
